Thing 18 2014: Explore reference management tools online

Although you may or may not consider them ‘social media’, reference management tools are one of the single most useful digital tools for a researcher today. Gone are the days of painstakingly changing each of your in text citations to a footnote, or changing each full stop in a reference to a comma because a journal required it. Online reference management tools allow you to:

  • import references from different sources (e.g. websites, library catalogues, bibliographic databases)
  • manage and/or edit the references once they’re in the system, and add manually any references that you cannot find online
  • export references into a document, either as a single bibliography, or individually (often called ‘cite while you write’) which generates a list of references.
  • format the bibliography according the referencing style of your choice, and re-format if/when necessary

There are a number of commercial products out there, some of which you may have heard of or be familiar with. Endnote and RefWorks are two of the most common here in Oxford; the Libraries have a subscription that allows University members to create a RefWorks account, and IT Services also supports Endnote.

There are also free reference management tools, and we’ll focus on those today. If you’re interested in a comparison of reference tools before you choose, there’s a VERY useful table on the Libraries’ reference management LibGuide.

If you’re interested in using any of these two tools but want a bit more help in getting started, the Bodleian’s WISER sessions are great. Unfortunately this term’s reference management session is booked, but the handouts are available and are a great place to start. Handy guides and cheat sheets are available for RefWorks, Endnote X4 and Endnote Web, Zotero and Mendeley on the Libraries Reference Management LibGuide.

Task
There are lots and free tools, but for Thing 18 we’ll look at a few of the free ones: Zotero, Mendeley and Colwiz. If you’re not already using a reference management tool for your writing, we encourage you to try out one of these tools (or give RefWorks or Endnote a go). If you don’t feel that you need to store or manage references at the moment, we still encourage you to read about the tools and explore their sites to get an idea of when they might be useful.

Zotero
Zotero is an open source tool that started as a plug-in for Mozilla Firefox but is now available as a standalone application compatible with the Firefox, Chrome and Safari. It’s free to use, although there are premium options available for a subscription fee. You will need to install Zotero Standalone if you wish to use Zotero to add citations to documents in Microsoft Word.

Zotero provides a great quick start guide on its documentation page, and Sharon Howard has built a fantastic Zotero Wiki resource for a British Library course. In addition to the standard import/export tools, you can also attach files or notes to references, sync multiple computers with your account, add items by ISBN or DOI, and assign collections or tags to your items to help you organise them. Zotero also offers mobile apps.

Zotero takes advantage of its syncing and online capabilities to offer social networking; you can create groups and share your reference lists with others.

Mendeley
Mendeley also requires you to create an account and download the programme, but it’s a desktop feature that avoid the issue of browser compatibility. Like Zotero, Mendeley offers a free version as well as the option to pay for premium features. Take a look at its getting started videos to get a feel for how it works.

mendeley

Mendeley offers some great tools beyond the basics. If you are starting with a great deal of files you want to organise (rather than researching from scratch), you can pull data from your computer into Mendeley. You can also use Mendeley’s PDF editor to annotate your PDF articles. Like Zotero, you can sync your account across various computers and the cloud. There’s also an iPad/iPhone app.

Like Zotero, you can share your references with others. Mendeley takes this one step further, however, by allowing you to set up a closed group and share full-text articles.

Colwiz
Colwiz focuses on collaborative work as well as reference management. Although not exclusively for scientists, it takes a scientific focus and offers support for referencing in LaTex as well as Word and Open Office.

colwiz

Colwiz also offers desktop and web-based services, although some features are only available on the desktop version. Colwiz’s real strengths come in its collaborative tools. It has features to help manage team schedules and tasks, including slightly more sophisticated groups, personal and shared calendars, team task management and more. Users can also set up research profiles (much like a Facebook or similar profile) and add contacts.

Exploring further
Try using one of these tools to add citations and build a reference list for a short paper. Can you import your references? Try changing the reference style after you’ve started.

Blog post
Now that you’ve read about and ideally played with one or more of these tools, tell us how you think you  might use them in your own work. If you already use these tools or similar ones, let us know how they work for you. If you don’t feel the need to gather references at the moment, do you think you might use the tools in the future? Tag your post Thing 18.

Bonus Thing 5 2014: Crowdsourcing

The wisdom of the crowd? Photo by Pedros Szekely

The wisdom of the crowd? Photo by Pedros Szekely

Researchers in a variety of disciplines have begun to experiment with crowdsourcing and what it can accomplish. Take the growing recognition of ‘citizen science’ in research – calling on the public to volunteer their involvement. At one end of the scale, this may mean massive data projects like those Zooniverse hosts, which have attracted over 1.1 million registered users thus far. The tasks that these types of projects involve are ones that require low skill but that cannot be done effectively by computers. Current Zooniverse projects range from identifying animals to transcribing and tagging written content. Crowdsourcing isn’t limited to the sciences; the recent Transcribe Bentham project at UCL asked members of the public to transcribe Bentham’s letters and proved wildly successful.

Although there are valid criticisms of crowdsourcing, proponents of crowdsourcing say that it brings together researchers from across the disciplines to engage in unique ways with the public. It certainly offers the opportunity to complete tasks that would otherwise be unthinkable – or at least unfundable. If you have a massive data project of a certain type, it’s possible that crowdsourcing offers you a legitimate option. But it isn’t always about big data. The work that the Run CoCo Project in Oxford does, for example, is about inviting members of a community to contribute unique knowledge and expertise to a project – for example, by adding historical information, identifying people or locations in a photo, or even asking communities to upload their own content. You might also take a look at the Jisc Developing Community Content projects; other types of projects ask participants to add contextual information, like HistoryPin, or tag images, like the Library of Congress Flickr Commons project.

Crowdsourcing projects can be far less ‘official’ than those you may see advertised in the news. There have been successful small-scale projects run via Flickr or blogs, asking members of research communities to help with identifications or similar.

It’s important to remember that while a crowdsourcing may involve the public or those interested in your discipline, it doesn’t usually mean less work. You need to engage those who may be interested – and keep them engaged. Studies have shown that in many projects, a small minority do the majority of the work. You also may need to monitor or quality control output.

Task
This thing certainly doesn’t ask you to undertake a crowdsourcing project, but it does ask you to consider whether crowdsourcing has or might have any role in your work. Take a look at some of the types of projects on Zooniverse and run via Run CoCo. Run CoCo offers a variety of resources for those interested in a project; take a look at their guides and reports. Jisc also offers a crowdsourcing infokit which is worth a look.

You may also be interested in crowdsourcing as a learning activity. If you’re involved in teaching, think about the role that participation in these projects might play in the classroom.

Blog post
Do you think crowdsourcing has any role in the work that you do? What about your discipline at large? Have you ever been involved in a crowdsourcing project? Tag your post #bonusthing5.

Further reading

Thing 17 2014: Using Creative Commons and other copyright need to know issues

Image by Opensourceway on Flickr

Image by Opensourceway on Flickr

Now that we’re looking at images, it’s important to understand the basics of what you can and can’t use online. This post won’t/can’t cover it all (governments are grappling with the complexities of online copyright as we speak!), but we’ll look at Creative Commons and how it frees us to share and reuse online.

Creative Commons is a nonprofit organisation that offers a simple, standardized way to give public permission to share and/or use your creative work. CC licenses offer various levels of permissions, from ‘all rights reserved’ to ‘some rights reserved’. CC licenses are now commonly found on photos, blogs (including this blog), published material, teaching resources, music and more.

Creative Commons License
An example of a Creative Commons Attribution-NonCommercial 3.0 Unported License


Tasks

  1. Take a look at the types of licenses available on the CC license page. Think about whether any of these might be appropriate for any of your work.
  2. You can search media sources, particularly Flickr, for CC-licensed images. On Flickr, you can go directly via the Creative Commons Flickr page. If you’re interested in looking beyond Flickr, try the Creative Commons Search Page, which allows you to search for CC-licensed content on Wikimedia, Google Images, Europeana, YouTube, SoundCloud and more.
  3. Explore Open Spires to see types of Open Educational Rerouces (OERs) are available online.
  4. If you’ve uploaded images on Flickr, go through the steps of adding a Creative Commons license (you don’t have to retain it or go to the final step if you don’t want to).
  5. Consider adding a Creative Commons license to your blog or another piece of online work by using the ‘Choose a license’ page.

Exploring further
If you’re interested in copyright online beyond the basic CC licenses, you can explore endlessly. You might also explore issues related to open access, particularly in scholarly communication. For some interesting places to start, take a look at the presentations from the 2013 Open Access Week in Oxford.

Blog post (Things 16 and 17)
We wanted to talk about CC license before you wrote a blog post, because we’d like you to find an appropriately licensed image from Flickr (or another media site) that you can include in your post. Make sure it allows sharing! If you’re logged into Flickr, you can use the ‘Share’ button to grab the photo for your blog directly. Otherwise, you can either download and then upload to your blog, or grab the html or link for embedding. Nottingham Uni offers a great attribution tool called xpert that allows you to embed the attribution in the image.

Once you’ve uploaded a photo to your post (with the proper attribution if necessary), write about your experiences with images sharing tools and copyright online. Would you upload your own photos? Would you use photo sharing sites professionally? Would you consider Creative Commons licenses for any work you have created? Tag your post Thing 17 and Thing 18.

Thing 16 2014: Exploring images online

Social media and digital tools are great for both finding and sharing images online. We’ll cover two types of image tools; online photo storing and sharing sites such as Flickr that allow you to upload lots of your own photos, and sites like Instagram that are designed for sharing rather than storing.

Flickr and other photo storage sites
Online photo sharing sites have numerous advantages over keeping photos on your hard drive (although they are not without disadvantages and shouldn’t be considered foolproof storage). They make it easy to share pictures and give you additional features for organization such as tags and search. This has benefits for both the photo owner and those of us who want to view or use images. Access controls let you control who can see or download which photos, and licence controls let the owner feel more secure about sharing images while users can feel comfortable downloading them. One of the biggest photo sharing websites is Flickr, and that’s where we’ll focus our attention today.

Task
To upload photos on Flickr, you’ll need a Yahoo!, Facebook or Google account. If you don’t have any of the above and don’t want to set one up, you can still use Flickr as a fantastic image discovery tool.

    • Go to Flickr. Use the search box or the explore option to find an image that you’d like to blog about. Experiment with different search terms, and see how they change what results you get.
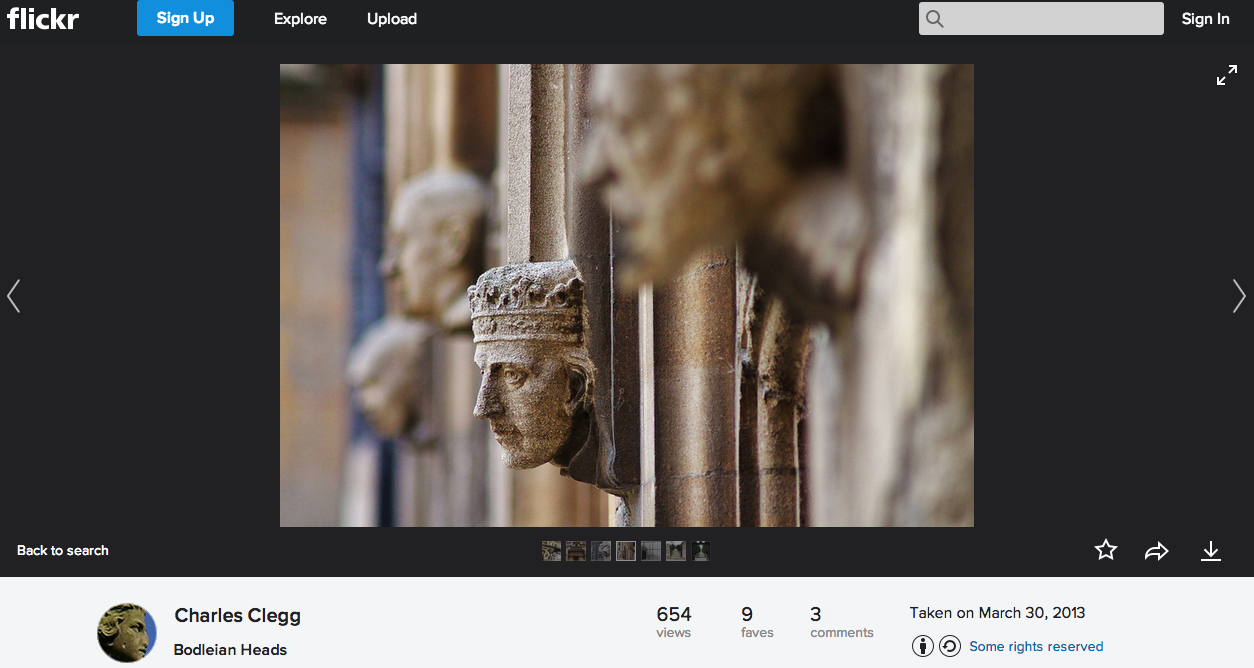
    • Note the features of a Flickr image. You’ll see the image right away. Below that you’ll see the username of the photo’s owner. Sometimes the owner will have added additional information such as date or type of camera/lens. If the photo is in any groups or sets, they’ll be displayed on bottom too. Below this, you’ll find the photo’s tags. Depending on the photo settings, these may have been added by the photo owner or by other Flickr users. Finally, you’ll see information about usage and licensing as well as privacy settings. You can download or share the image via the options at the bottom right of the image section (the share button looks like an arrow to the right, and the download options are on the far right and a downward arrow).

Screen shot 2014-10-05 at 17.06.47

    • If you don’t want to create an account, spend some more time browsing images. Check out the Oxford Flickr Group, the Oxford Natural History Museum Group (not officially run by the Museum, but the group works with museum staff), the Great War Archive Flickr Group and the Flickr Commons. Note the different purposes of these groups. The first is for enthusiasts; the second is centred on a particular institution and its work. The final group is a great example of using Flickr for crowdsourcing; the images have been contributed by people all over the UK as a part of the The Great War Archive. The Commons has a similar crowdsourcing purpose. If you don’t have or don’t want to create an account, skip on to ‘Exploring further’.
    • If you have or want to create a Flickr account, do so now. Take some photos to upload, or upload one or two you already have – perhaps something that illustrates the work or research you do.
    • Upload these into your Flickr account and tag at least one of the images with ‘23 Things for Research’ (read more about Flickr tagging). Please make sure that the images you upload are your own, or that you have received proper permission to share them.

Instagram and other ‘sharing’ sites
In addition to sites that let you upload and organize your images, there are also apps and tools that are designed for ‘one off’ sharing. Instagram, for instance, lets you share photos and 15-second videos straight from your phone or tablet, edit them with filters and captions, and share immediately with your followers (Vine also lets you share short videos). Take a look at the way American universities are using Instagram for some inspiration, explore the great things museums like the Smithsonian are doing with Instagram or think about the ways students could use Instagram to show the work they’re doing.

If you’re interested curating images online rather than sharing your own, you might try using Pinterest, which allows you to ‘curate’ images – both those you upload and those you find online. It’s essentially an online bulletin board and can be great both as a personal tool for remembering images and bookmarks and as a tool for sharing links.


Exploring further

  • Flickr isn’t the only image sharing or image search tool out there. If you want to look at some others, try:
  • Flickr makes their data available so that others can build online applications using its images. Take a look at some of the tools in Flickr’s App Garden. Some to try:
    • Show where you have been on your travels by adding your holiday snaps to a map with Mappr
    • Be creative and gather photos into a mosaic using Montager

Blog post
We’ll be giving you guidance on a blog post in the next thing (Creative Commons and copyright), so sit tight for now!

Further reading

Bonus Thing 4 2014: Using augmented reality in the classroom

Augmented reality in the classroom? It’s not so far fetched! There are numerous tools that make it easy via an iPad or smartphone. It’s true that AR is still in its infancy, but there are some fun ways to try it out. Since this post’s focus is on trying out tools, we’ll keep it short and sweet with the idea that you actually give some of these things a try.

What is Augmented Reality?

Augmented reality combines a user’s actual world view with one that includes additional computer-generated information or functionality. It generally uses one of two methodologies:

  • Marker-based AR uses software to recognize a specific pattern such as a barcode or image.
  • Location-based AR uses location or GPS to provide information that is appropriate to a specific location.

This Ted Global talk by Matt Mills of Aurasma gives a great intro to the potential that AR offers.

Task: Exploring tools

There are huge varieties in the tools available, and the skills and investment needed range quite widely as well. We suggest you pick a few from the tools below to explore and write about in your blog post (be sure to tag your post ‘Bonus Thing 4’).

  • Aurasma: Aurasma offers huge potential in the classroom. It allows anyone to  ‘layer’ information over a real-world view – whether that’s a landscape or a painting, some text or an object.  Access to the basic tools is free and allows anyone to upload a ‘trigger’ image and create ‘overlays’ that you get when you scan the trigger image. Anyone can then use the free Aurasma app to scan the trigger.
  • Layar: Similar in many ways to Aurasma. Also offers a free basic model (though it may have ads).
  • Google Glass: The ultimate AR experience? Unfortunately not available to the general population, but worth a try if you can get your hands on one.
  • ZooAR: Allows you to view a selection of animals and insects in 3D.
  • The tools produced by the SCARLET project: The SCARLET project began by looking at ways to use special collections material and has expanded its remit into a variety of education-focused areas.
  • Google Sky Map (Android only): An Android implementation of Google Sky that allows you to use your smart phone or tablet, pointed at the sky, to get location-based information about what you see above you.
  • Google Ingress (Android only): Perhaps less of an educational tool, but an important step in Google’s foray into AR. Ingress is an augmented reality massive multiplayer online game that uses location-based ‘portals’ at places of public art, landmarks, etc. to shape a story with a strong sci-fi influence.

There are certainly other tools and apps available; these are just a sample of those we’ve seen used well. Let us know if you have used any others!

Further reading:

Thing 15 2014: Sharing research online

Videos and podcasts might be a growing part of sharing information, but it’s a rare researcher or University staff member who doesn’t have to give at least the odd presentation – and many lecturers are using presentation tools on a daily basis. In Thing 15, we’ll explore some new tools for creating presentations, and you’ll take another look at sites like Slideshare that let you share your research and presentations online.

Presentation tools
Most of us are, by necessity, familiar with PowerPoint and/or its Apple counterpart Keynote. There are open source alternatives, although you may find they’re not always compatible in the ways you need (there’s a list at Alternative To).

Prezi is growing in popularity and offers an interesting alternative to the usual static slides you normally see. Prezi allows you to zoom, pan and layer levels of information, although these tools need to be used well in order to be effective. Instead of presenting a linear story, you can move around a storyboard, highlighting connections.

Prezi can take some getting used to, but it’s worth jumping in and giving it a try. Take some time to experiment with it and think about what it could offer to help you share your research, present a subject to students or colleagues, or create an informational or induction presentation. You can even use Prezi as a collaboration tool – it’s great for mind mapping with colleagues.

We particularly like this presentation by Ned Potter of the University of York on how to make good Prezis. As well as showing you what Prezi can do, it’s a great example of exactly that – a good Prezi: The how to make a great Prezi, Prezi on Prezi:

The How to Make a Great Prezi Prezi


Presentation sharing tools
Now we’d like you to think about uploading your own research or presentations to them. We love the following tools:

These tools give you the opportunity to store all your research presentations or teaching material in one place. Maybe you gave a presentation at a conference, and you’d like other people to have access to it (or you’d like other people to see that you’ve been providing expert comment on the topic). Perhaps you use presentations as teaching tools, and you want your students to have access to lectures after the class. These sites bring your presentations to a much wider audience than you can ever hope to reach with handouts or even an institutional website. They also let you embed your presentations in blogs and websites.

Have a look at each site (and feel free to look at others), and pick at least one to try. If you have a presentation floating around, upload it (extra credit: tweet a link to your presentation). Many of these sites let you upload PDFs as well as PowerPoints and other formats, so your ‘presentation’ could even be a simple handout. If you don’t have any presentations to upload, think about when or how you might or might not use these sites.

Exploring further: Some notes on presentations in general
Since we’re on the subject, let’s talk about what makes a good presentation in general. There are blog posts, courses and books galore on this, but we think it deserves addressing. Presentations should be engaging and interesting, and the standard bullet point format, while effective in the right context, can be the opposite of engaging.

If you’re looking to breathe life into your presentations, there are some basic things to keep in mind:

  • Cut text. Less is better.
  • Don’t read our your slides – they’re there to support what you are saying, not replace it.
  • Keep to one point per slide.
  • Use good images (studies even show that this improves retention!)

Blog post
Now that you’ve experimented with Prezi and various presentation-sharing tools, what do you think they could add to your work? Can you see yourself using them? Do you think they can help you find new audiences for your work?

Tag your post Thing 15.

Further reading

Thing 14 2014: Discover Wikipedia

Picture 1

Did you know?

  • There are over 4,300,000 articles on English Wikipedia
  • 7% of the planet reads Wikipedia
  • All content (including discussion and sandboxes) is public
  • 7% of edits are malicious and the median time for removal is <2 minutes
  • There is a special tag for dinosaur images that are anatomically inaccurate!

Wikipedia is the best example of what the ‘wisdom of crowds’ can achieve, although it is not without its detractors. To get an overview of the pros and cons, read the Wikipedia page about Wikipedia itself, and some of the pages linked to from it. Wikipedia is often criticized as inaccurate or unreliable, but it is in fact one of the biggest sources of factual information online, and studies have shown that in many cases its accuracy compares favourably to other established online encyclopedias (see Nature’s article ‘Internet encyclopedias go head to head’). Even controversial Wikipedia articles can offer an excellent picture of the controversy itself via an article’s discussion page. Like any encyclopedia, Wikipedia articles can be a great starting point for research.

Task
Many of you will already be familiar with Wikipedia itself and how to find information, but it pays to explore some of the article elements a bit further. Start by looking up some things that interest you; see what Wikipedia says. One of the most useful elements of Wikipedia is its strong citation policy. Look at the references linked at the bottom of the page – whatever the merits of the Wikipedia article itself, this can be a good starting point for research elsewhere on the web.

Many people are unaware of the ‘history’ tab (top right) and ‘talk’ tab (top left) for Wikipedia articles. These can make very interesting reading, particularly for controversial articles or subjects where there are strong opposing viewpoints, as you can see how the current version (and consensus) has been reached. Here, readers can suggest changes that they think should be made and argue their points; the discussion can get very in-depth and occasionally heated! Take a look at the discussion for a few articles.

Exploring further
Wikipedia is only as good as its authors, and we encourage you to give editing a Wikipedia page a try. It’s easier than you might think! Although you don’t have to have an account, we’d encourage you to set one up as it allows you to participate in discussions more easily and, though it may seem counterintuitive, allows you more anonymity (you can operate under a pseudonym with an account, but an anonymous edit records your IP address). Take a look at the Public Library of Science’s ‘Ten Simple Rules for Editing Wikipedia’ before you get started, and use Wikipedia’s markup cheat sheet as a guide.

Just one caveat: Do keep in mind that you’re not generally encouraged to edit information about your own company or organisation, as it may present a conflict of interest. If you’re worried about this, take a look at how the US National Archives have turned Wikipedia into a positive tool while avoiding these conflicts.

Blog post
What are your thoughts on Wikipedia as a source of information? Do you think it is reliable? Do you think that having the information on the history and talk pages available adds to your understanding of page topics? Tag your post Thing 14.

Further reading

Thing 13 2014: Making information beautiful

6238509140_bc5019ba4e_b

This is a new ‘thing’ for 2014, representing the data-driven direction in which many of our outputs are taking. We’ll explore some simply tools for visualization of information.

Getting started

Google Public Data Explorer
Google Public Data Explorer is a tool developed by Google Labs that makes large datasets easy to explore, visualize and understand. It offers a simple way of generating different views and graphs (e.g. bar charts, line graphs, etc.) to better understand and present data.

Currently a range of public data (130 datasets as of 6 August 2014) from organizations and academic institutions—including US Bureau of Labor Statistics, Eurostat, Statistics Iceland, etc.—are available for users to explore interactively. You can also upload your own datasets, using the Dataset Publishing Language (DSPL) format, to Google Public Data Explorer for visualisation and exploration.

It is important to note that you will NOT be able to export data, only manipulate them within the Google Data Explorer environment. However, you can embed the data as part of a website or email the link to someone else. The tool produces interactive, animated graphics using the four available chart formats.

Gapminder
Gapminder is a visualization software package created by a Swedish Foundation to help enliven and disseminate freely available social science data using animated, interactive graphs.

Gapminder is powered by a software called Trendalyzer (which is owned and licensed by Google) and comes with a staggering range of data collected worldwide (519 datasets as of 6 August 2014), on subjects from national economies to AIDS.

It is also possible to use Gapminder to display data over a map so the statistical changes can be seen geographically. However, it has a limited ability to upload and visualize private datasets (possibly via the use of Google Docs) with certain functionalities (e.g. map) not supported.

Tableau Public
Tableau Public is a free desktop tool for generating interactive data visualization, graphs and reports onto the Internet. You can use this application to analyse any type of structured dataset, and can publish the work to Tableau Public web servers where they will be readily accessible to the general public.

Tableau Public is an advanced desktop tool for people who don’t have programming skills but still want to create highly interactive data visualisations on the web. It offers a ‘visual data window’ that allows you to connect different data sources by simply pointing and clicking. You can also apply various filters before exporting the data. Tableau Public can connect to Microsoft Excel, Microsoft Access, and multiple text file formats but has a limit of 1,000,000 rows of data in any single file.

The published data saved to Tableau Public is accessible by the general public but the you can remove your content later if needed. There are also paid versions of Tableau software, namely Tableau Personal and Tableau Professional, that allow you to save your visualization works locally.

Most of the tools discussed here use publicly available datasets for generating the visualisations and graphs. When using a tool that allows you to upload your own data collection, for instance Tableau Public, you need to consider if these are any restrictions on those data being hosted on a public server.

Blog post

Think about the role of data in your research, and what formats you’re expected to present it in. Will any of these tools be useful? Tag your post thing 13.

Thing 12 2014: Making and sharing podcasts and videos

By Popperipopp, via Wikimedia Commons

By Popperipopp, via Wikimedia Commons

You will NOT need to make or upload a podcast or video to complete this thing, but this post should give you some idea of the tools available to do so; please take some time to explore these tools and think about how they might be useful to you. If you’re feeling brave, we do encourage you to try them out – even if it’s only for a brief screen capture or a video to introduce yourself. If you’d like to learn more about podcasting, there are still places available (at time of publishing) for the IT Learning Programme’s Podcasting for Education course on 10 November or Podcasting at Oxford FAQs course on 8 December.

Making your own podcast or video can be fairly straightforward, and there are lots of free tools to make it easier and add bells and whistles. For now, we’ll deal separately with screencasts, which offer a video recording of action on a computer screen (with or without an audio track), and standard videos.

Screencasts
Screen capture tools allow you to make a video, often narrated, showing how to do something on a computer. They record your mouse as well as everything you click on and show on your screen. Screen capture is a great way for showing students, colleagues or a wider audience how to use an online tool.

There are a number of screencasting tools available, both free and for purchase. Many departments within the University use Adobe Captivate, which has some great features, but it isn’t free. It certainly isn’t necessary to spend lots of money to make a good screencast, however, and we’ll cover a couple free tools that do the job.

Some general tips:

  • Speak slowly and clearly
  • Write a script and run through what you’ll be demonstrating in advance

Screencast-o-matic
Screencast-o-matic is fairly intuitive, so you can get started right away. You may want to create an account (so that you can store and keep track of your videos), and you can also watch a short demo that walks you through the recording steps.

Picture 2

To begin, press ‘Start recording’ on the top right. A frame will appear (make sure Java is enabled – if this is an issue then you can download an app); you can drag and resize this frame to suit your needs, and you’ll also see some options for size, etc. Once you’re ready, simply press the red button and go. If you don’t want to record anything, make sure you mute your computer’s microphone (otherwise you’ll get a lot of white noise).

When you’ve finished, press the ‘done’ button and choose where to upload your video

Jing
You can download a free version of Jing. You will get a ‘Sun Launcher’ button on your screen. Hover over the sun and choose ‘Capture’. Click and drag to select a portion of your screen, and then release the mouse when you are happy with the image you have selected.

From here, you can do two things: 1) take a still screenshot or 2) make a video. You can annotate your screenshots with text or arrows. When you’re happy with what you’ve done, click the ‘save’ button.

Other free screencast tools:

Video and audio recordings

If you want to make an audio podcast, you just need a relatively modern computer and a microphone. Many computers have built-in mics that will do the job, although you may find that investing in an external mic is worth it for the improved sound (use a USB mic designed for the job if you want to avoid extra purchases like an external sound card). You can use any standard tool on your computer to record your sound; Windows Sound Recorder on Windows is free, and many Macs come with Garageband. You can also download a free tool like Audacity, which will also give you tools to clean your recording up a bit (this can be useful if you’ve made any mistakes or want to piece together parts from different attempts). The JISC-funded Steeple project has a great tutorial on Audacity.

If you want to do a video podcast, you’ll need a video camera. This could be a simple USB webcam or something more expensive; you can even use your smartphone. Again, you can use Windows Movie Maker or iMovie if you want to stick to free tools.

Publishing your video or screencast
You can put your video up on a video hosting site such as YouTube or Vimeo, and these are often the best place to start. Once you’ve uploaded a video there, it’s easy to grab a code snippet that allows you to embed your file in a blog, on WebLearn or on another website.

If you’re in the University, you may want to take a look at IT Services’ guide to publishing your podcast. It gives guidance on using OXITEMS and RSS as well as what you need to keep in mind to be added to the University’s iTunes U page.

Other helpful notes
If you need copyright-appropriate images, clips or sounds/music to use in your podcasts, videos or presentations, there are some great search tools out there:

Blog post
This thing may require a lot of work, particularly if you haven’t used these tools before and want to give them a proper try. If you have used them, let us know what you thought and how they enhanced your research, teaching or other work. If you haven’t, explore them and let us know how you think you could use them. Please do upload sample of your videos, screen captures or podcasts – real examples are always welcome!

Tag your post Thing 12.


Further reading

Bonus Thing 3 2014: Digital curation

Using technology the potential for individuals to draw together their own collections of online resources is enormous. In this Thing we are looking at online curation, using tools like Pinterest and Tumblr. We’ve already discussed Storify and tools for sharing text-based content, but let’s explore some more visual tools. We’d like to look at two aspects: (1) the way that researchers and teachers of the public can use various websites and tools to curate collections around their chosen topics, and (2) how academic professionals can use these tools to curate a collection of links and resources relevant to their work and professional development.

Untitled

Pinterest allows users to create virtual pinboards of images and videos according to their interests.

  • Researchers and academic institutions are using Pinterest for many purposes. Here’s just a few examples:
  • Researchers can also use Pinterest to collect resources relevant to their work. See the Pinterest boards developed to support 23 Mobile Things as an example, or the way the University of Virginia uses it to showcase staff output.
  • Many instructors are using Pinterest to create reading lists or boards of relevant content. The LSE blog covers a ‘how to’ (though be aware of copyright issues), while the Bodleian Education Library provides a good example on their ‘New Teaching Resources’ board.

Tumblr, a microblogging platform, allows users to post their own content or “reblog” content posted by other users. Posts can also be tagged with hashtags (e.g. #libraries).

Explore further

Blog post

Have you searched for material in your research or study area on Pinterest and Tumblr? Do you think that you could use these tools to share information or collate it all in one place for personal use?

(Adapted from 23 Mobile Things).