
July the 1st marks the 100th anniversary of the Battle of the Somme, and with it the anniversary of the day of the greatest loss of life in British military history.
Trench maps made in preparation for the battle are shown here, as well as editions of sheets made during the battle itself, which lasted from July to mid-November. A trench map, especially one covering an area of heavy and prolonged fighting, gives a false impression of the land it portrays. Farms and woods shown on the maps would have been the ghosts of buildings and trees long since destroyed by bombardment, and only the heaviest of craters left after detonated mines would be shown, not the shell holes of no mans land.

Apart from a few ‘secret’ maps which included both English and German trenches the majority of maps show only the German trench systems in detail. These maps show the incredible lengths that armies went to the defend ground and supply those in the front-line. German trenches have numerous support and communication trenches, fall-back positions and artillery areas and were of a higher standard than their English equivalent, many of which were but a short distance away.
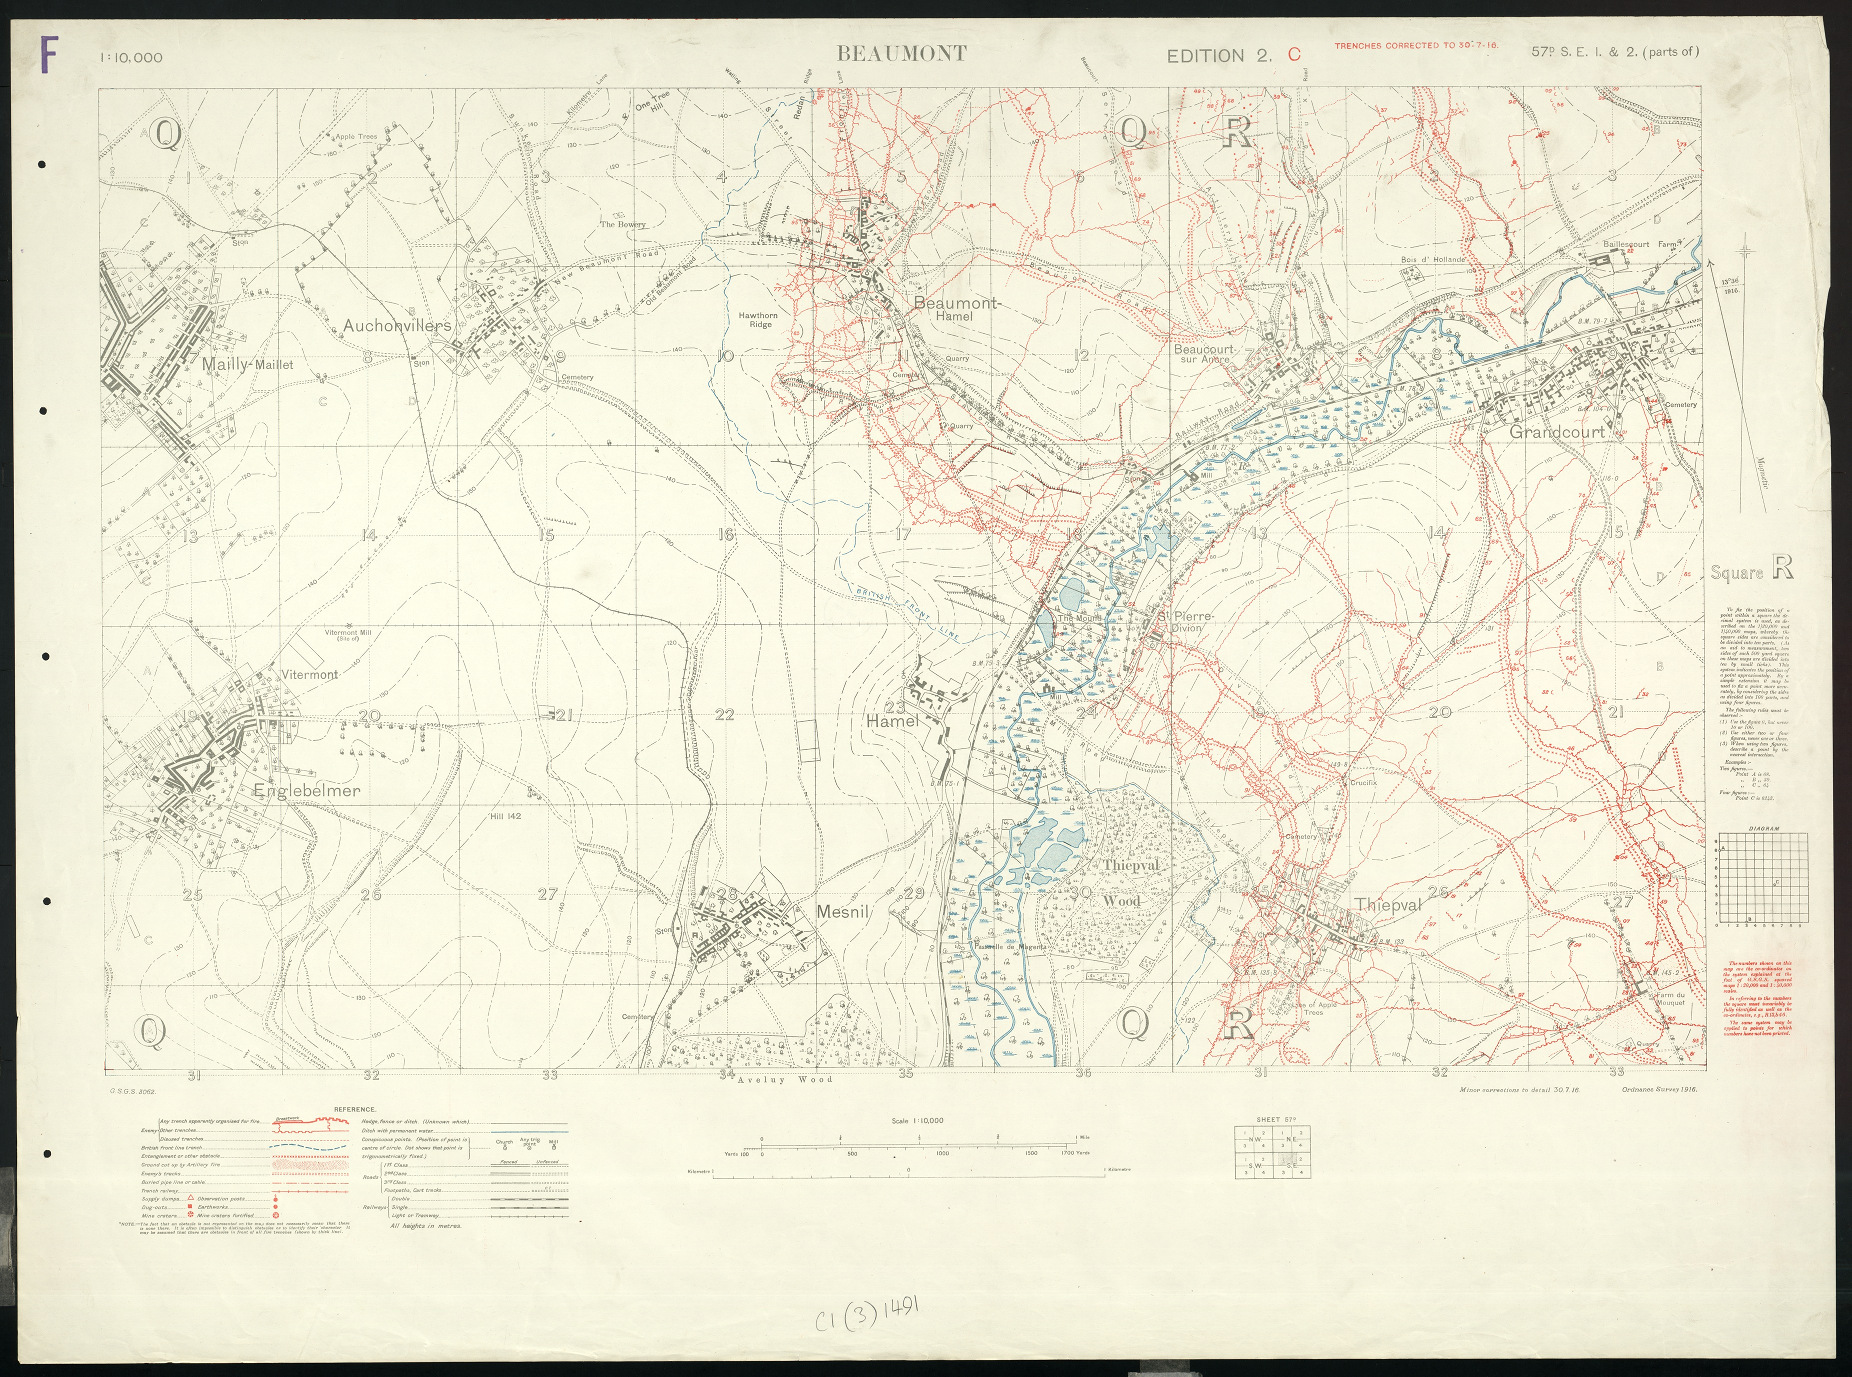
Beaumont, 57D S.E. 1 & 2 (parts of). War Office, 1916. These two trench maps are of the Beaumont Hamel and Thiepval areas, both scenes of intense fighting on and after the 1st of July. Comparing the two maps shows how little progress was made in the fighting. The first map has trenches corrected to 28-4-16, the second corrected to 30-7-16. C1 (3) [1490] and [1491].
As German attacks in 1914 and early 1915 came up against stiff opposition they were able to build strong defences behind their front-line, taking advantage of higher ground and then fall back into these positions. Dug-outs were constructed deep into the ground and trenches were lined to prevent flooding. These defences were able to withstand the withering artillery that the British rained down on the German front-line in the days leading up to July the 1st, and as troops went over the top at the given signal German troops were able to lay down a fire which proved fatal to the advancing troops, many of which were from Pals Battalions, formed from towns and cities, sometimes places of work, and fighting for the first time. The enormous loss of life on the first day, nearly 20,000 killed and many more wounded, meant that many communities back in England shared in a collective grief.
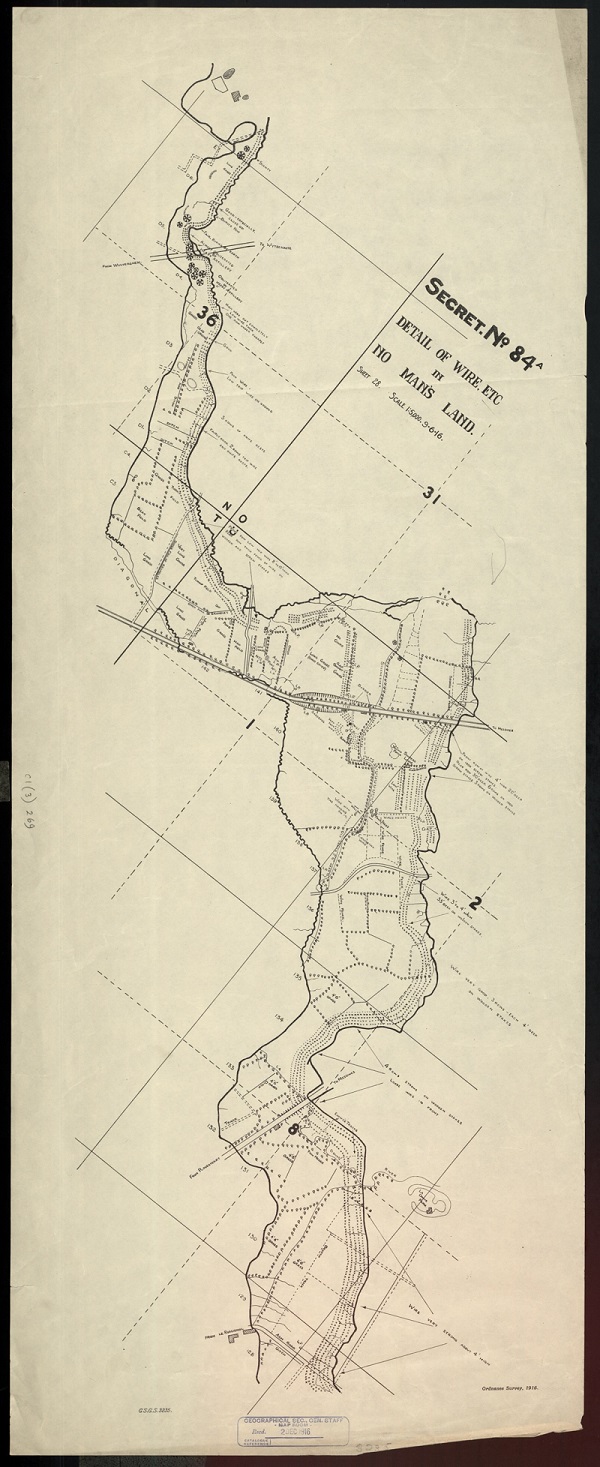
Detail of wire etc in no mans land, June 1916. Map showing trench systems in an area north of Ploegsteert Wood, Belguim. C1 (3) [269]
Trench map development mirrors that of the war. At the out-break of hostilities in 1914 British forces fought an enemy constantly on the move and so less-detailed mapping, French 1:80,000 and Belgian 1:100,000 sheets, were used. It was only when fighting became static with the introduction of trench warfare that more detailed, and more accurate mapping was necessary. These maps were designed for artillery, targets are highlighted in red circles while grids are incorporated into the maps so exact locations can be pinpointed both by Signallers and those manning the guns behind the lines.
The Bodleian has a large number of trench maps from the First World War. As well as maps by the British there are a small number of German and French maps as well as a large number of maps covering he Gallipoli campaign in both English and Turkish. Along with officially produced maps by the combatants cartographic departments, newspapers and commercial map publishers produced maps for the home market.

The front page of the Pall Mall Gazette for the 1st of July. N. 2288 b.4